How To Use Your Units: Overview
FAQ's taken from: http://www.freewebs.com/taoschool/
Bottle and Inu have done alot, credit to them for these
The Basics of Battle (link): http://tacticsarena.com/guide/battle.php
More Basics: http://www.freewebs.com/taoschool/advancedgreytactics.htm
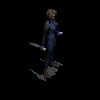
The Knight

- The Knight
Many newbs consider the knight to be the only way to win a grey game. I've lost count of the number of 900-rated-or-so greys who've taken out my knights at great cost to themselves, because they believe (as I did once) that whoever has the most knights in the endgame wins. They are wrong. The knight is not an endgame unit, except in particular circumstances, but rather a powerful weapon to throw out early in the game.
The knight has many strengths, and few weaknesses. Its main strength is for dealing with lightly armored units with a high recovery, such as the scout, pyro, witch and cleric. A common and effective tactic for knights is to move into attack range of a mage, take the hit, move in and attack, heal, then attack again and retreat. A knight will kill a cleric, pyro or witch in 2 hits regardless of healing, and since the knight recovers before the mage does, he can attack twice and then retreat to safety. This means you end up a unit up, and your knight is in a safe knight wall on about 30 HP (depending on what happened between his attacks), which can easily be healed.
The knight is also the best way to kill the scout, which if you can do without losing too much of you own stuff, will win you the game 90% of the time. A good player will keep his scout away from the knights though, so you'll need to be bold and charge in. I would gladly swop one knight or even two to get the enemy scout, so long as my chanty is still alive.
Knights are also vital in same side turt matches, where they make a solid wall from which you can spring attacks on weak spots in your opponent's formation. Just be careful of mages hidden behind the enemy knight wall, which can chip away at your knights faster than you can heal. If possible, try to use your knights to take a LW hit. Ths then renders the enemy's LW useless for 4 turns, in which time you can get your other 2 knights through a hole and close to your opponent's cleric.
Only one thing can stop a lone knight with 2 cleric backup, using the attack-heal-attack-heal technique, and that's a chanty. But we'll come to that later. Just make sure that you don't send your knights into freezing range while your scout is in recovery, because if you do, it's basically a one-shot kill if your opponent knows what he's doing.
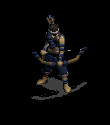
The Assasin
- The Assassin
Any unit which has another attack added to it was obviously not strong enough beforehand. This is the case with the assassin. While it makes a useful flanker, it dies in 2 hits from a knight or knight/scout, and also from a LW/witch hit regardless of healing. Therefore, you need to keep it out of range of high-powered units, although with it being a melee unit this is often very hard. And similar to the knight, it gets stopped dead by the chanty too.
The new attack, dubbed the "ass bomb", is interesting but often not used. Again, it's a potential threat. People will waste time killing the assassin, being careful not to reduce it to 5 or less HP. You have to use that time wisely. Once someone has been got by the ass bomb once, they won't let it happen again. So the only advantage it has is to make your opponent worry. To actually do the "ass bomb", your assassins health must be at or lower than 4 health. When attacking you click the actual assassin and hold down the click until the white aura underneath the assassin disapears, then release to do 99 unblockable damage to the 4 surrounding squares.
I use my assassin as a wall unit. Its superior blocking make it useful for this, and also handy for breaking focus when my scout isn't able to. That's about all it does. With 18 power, little HP, and the need to be close to attack, it's too easily killed and not strong enough for my liking. It's the first unit to take out when you get a cleric, chanty or witch drop, after the pyros.
The Scout
- The Scout The third most important unit in the grey game for defense, and most important for attack, is the scout. With its massive range of 10, this guy will save you life against a good player and cause havoc against a bad player.
As mentioned already, the scout has one major weakness; its susceptability to knights (and witches). Don't take your scout into range of a witch unless it's absolutely necessary, or if it will win you the game as a result (eg. to kill a chanty, or cleric if the chanty is dead already). It should be moved into a safe, but threatening position at the start of the game, and stay there. It should NOT be used to attack anything until the chanty is dead, unless you haven't got your knights in close yet. Don't leave it isolated either; a determined knight can reach it even with its long movement range. And at all costs, DO NOT MOVE IT INTO CHANTY RANGE. Remember, a chanty that just moves, waits, then moves again has a range of 8, and will freeze the scout before the scout recovers. If you have to move the scout within 8 spaces of the chanty, ensure that the chanty will then be either out of BW range or attacked by another unit before it can be barriered. This cannot be stressed enough. You get your scout frozen and the offending chanty barriered, and you can say goodbye to the game.
Now, the scouts strengths. At this point I will draw your attention to my clanmate nads' LOS site, which is found at http://www.freewebs.com/nadstaosite/ . This is the definitive site for LOS. And if you don't know LOS, you're wasting the potential of one of your best units. It is vital knowledge, not least for when you want to defend against an enemy scout. No cleric will ever be safe again once you've memorised this.
Another strength of the scout is when you don't have time for your knight to make 2 attacks on a witch. A knight/scout combo will kill a witch regardless of healing, but not a pyro. Pyros are better dealt with by the knight alone, or the scout alone. A scout takes 3 turns to kill a pyro, even when it's healed once. This is quite difficult to pull off, so I'd recommend using a knight to take pyros if you can.
Finally, don't expect the scout to block everything from the front. Look at it this way; would you expect a knight to block a side shot? No? In that case, don't expect a scout to not miss a front block. It's exactly the same chance.
In summary, the scout is very much a focus-breaker and finisher-off of weakened units in the grey game, and as such should be kept well out of the action. Keeping it in BW range is recommended if the enemy is close to you.
And I have found a diagram of the scout los, very useful.
The Cleric

- The Cleric
One of the most targeted units in the grey and gold game, and with good reason. If you can swop anything other than your scout or chanty for the cleric, do so. If you have have enough units left to make a solid defense, and can outlast the opponent, then getting the cleric should win you the game.
The cleric is very specifically designed not to be able to heal a critically injured unit very fast. It's a fact of the game, and one you need to use to your advantage. Many flawless wins are due to a player not understanding how a cleric works. If it heals 12 points to every unit, then make sure damage taken on your units is spread around. Similarly, focus on one enemy unit at a time to prevent the enemy cleric's full effectiveness.
12 may not sound much when the biggest attack on the game is 30 and the minimum is 15, but factor in the 3 recovery (you should never move your cleric around, unless it's about to die anyway) and give yourself a cleric drop, and you can heal 24 HP every 4 turns. But don't get obsessed with healing, because that only leaves every other turn for an attack. If you're not attacking, your opponent has free rein to move and attack as he wishes.
Don't look at a 2 cleric formation and think "oh god, how can I beat this". Or rather, do. The answer is simple; still concentrate on one unit at a time. To save a mage from the knight's attack-heal-attack routine, you'd need to heal twice, and the mage will still be on less than 10 HP and the enemy's clerics both in recovery. In a game like this, your enchantress will be of even more use, because to *kill* a unit, she doesn't inflict damage. See the chanty section for help with this. Don't try and kill a knight when the enemy has 2 cleric, because it's a waste of time. The enemy will wreak havoc, retreat once the knight is on about 20 HP, and heal it back up to full health. Use a chanty instead, or better still, go on the attack and aim for the weaker units. And remember, 2 clerics means one less attacking unit, which means one less person to get in the way of you killing the chanty and cleric(s).
A turtle should always have a cleric in the corner, and often have a BW on one side of it or just in front of it. Defending the cleric is a lot easier if the BW is next to the cleric, because knights can't get through. Of course, if you're using your BW, then the knights can break through it, so be careful. And putting a BW next to a cornered unit means only one route of escape too. But with the cleric, this is of little consequence, since moving the cleric is usually a waste of time.
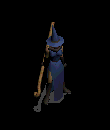
The Enchantress

- The Enchantress
This section is vital. The chanty will only get involved in about 50% of your games, but of those 50%, she will singlehandedly win about 25% of them. She's just that good.
Now, the chanty is a mighty weapon, but has one major weakness: the scout. If she gets attacked by a melee unit when she is not recovering, she can simply freeze the offending unit, be healed, and barriered again, and you have another unit trapped. The chanty is only of any real use when you use her in conjunction with a BW, because if she gets attacked while she's still recovering, you can say goodbye to her.
When using the chanty, you have to take down the ranged units first (see the tactics section). After that, if you've got enough units left and the chanty and BW still intact, you should never lose the game. Imagine it's your cleric, BW, chanty scout and knight vs. 3 knights and assassin. The enemy has to attack you, or get picked off slowly by the scout. So you draw in one knight to freezing range, make sure that no other knight/assassin can attack you where you are moving to, and freeze the knight, being sure that you don't freeze your BW at the same time. (Freezing one of your own units doesn't matter that much; indeed, it makes opponents more likely to attack them, meaning that they can be frozen too.) When another knight charges up to attack the chanty, you barrier. 2 turn recovery left. The knight attacks the barrier, and you heal. 1 turn recovery left. The knight still has to wait, and maybe moves up another knight. You snipe the frozen knight with your scout, so the enemy is more desperate to get the chanty. 0 recovery left. The recovered knight attacks the chanty... and you refreeze. Now you have 2 knights.
The enemy, by now, will be desperate. He'll send in another knight. As soon as he gets within striking distance of your chanty, you barrier her again. (Heal if possible before barriering.) He will attack the barrier, killing it if he is using a knight. By now though, both your cleric and your chanty should be recovered. Use your cleric, and move him up next to the chanty. If the enemy attacks the cleric, you freeze the knight that does it as well, and now you have 3 knights trapped. If he attacks the chanty, the chanty freezes again. The chanty is then surrounded on all sides and unable to be attacked. You can then pick off the assassin with your scout and knight.
As you can see, a seemingly weak position (4 attackers vs. 2) has been won by the chanty.
The other main use of the chanty is against 2-cleric formations. It takes a heck of a lot to kill a knight backed up by 2 clerics. The answer? Don't play to your enemy strengths. If there's no easy way to kill the units, don't kill them. Use your chanty to freeze the knights, as shown above, and you don't need to worry about the double clerics.
Remember that a good player will know the potential of the chanty, and deal with it. Send in 2 knights and have a scout hanging around, and even the best chanty/BW formation will have serious problems. If the scout is not recovering, the chanty will be shot before she can be barriered, and then she has 3 recovery and a few angry knights next to her. Not good news. For defending against this, you'll need knights and assassins for your chanty to hide behind. But the danger then is that a witch will move up through the area where the enemy knights are, you'll be unable to send out knights to kill her without being broken through, and you'll lose your cleric. Then you're in trouble.
Surprisingly, a chanty form is best suited to attack, similar to the furgon. But that will be covered in my Tactics section.
The Barrier Ward

- The Barrier Ward
BW for short.
The most underrated unit in the game is undoubtably the BW. It's got a lot of potential, and not just as a defensive unit.
In defense, though, it's incredibly useful. With the chanty, it can *kill* 3 knights without a problem. It can be used to barrier a precariously positioned unit and give it the chance for another attack, or for it to retreat and be healed. It can be used as part of a defensive wall of knights. Although, as stated above, even it can't save you from a witch kill on the cleric if you're playing all-out defense.
In attack, you need to be more careful. If it's positioned at the back rank, flanking the cleric, its atacking potential is limited. But if it's close to the LW, near the front but not so close as it's easily targeted by a scout, it's very useful. When the enemy has just used his LW, send up a mage and attack. Take a hit on the mage and barrier, wait until you've recovered, and attack with the mage again and retreat and heal. BWs are the only thing that can stop the old knight-kills-mage routine.
You should position your BW either on the back rank, or 2 spaces behind the LW. That way, knights can't attack it without entering LW range, scouts have difficulty getting it, and mages can't attack it without flanking or moving into LW range either. They have more attacking potential when behind the LW, but they are also easier to snipe and don't protect the cleric as well. It's up to you, but I prefer to put mine next to the cleric.
The Lightning Ward

- The Lightning Ward
While we're on the subject of wards, let's talk about the often-misused LW. People always seem to use it on my knights in a same-side turtle match. Why? My knight still has 27 HP left, and your LW is useless for 4 turns. Even worse are the people who use their LW on my LW. You can go on and on about how a witch-LW-pyro combo kills a LW, but I don't care about that. You waste a few turns doing that. Meanwhile, I'll send my knights in to kill a couple of your mages. If I feel like it, I'll barrier the LW when it's on about 10 HP, so you still can't move your mages past it and you've wasted time trying to kill something that isn't going to die.
Now, how to use a LW PROPERLY. Answer: don't use it.
It's going to be a threat unit, and a wall unit. As a wall, it's immensely useful; it can block the witch from getting your cleric (but from only 1 direction, remember... a flanking witch will still get you), and it blocks knights from getting through. That's all its use will be, though, if you insist on using it on knights or other LWs. The threat is gone as soon as it's used. You may find that you zap a knight, and then get 3 or 4 mages in your face, walloping your knight wall all over the place, and you can't do anything about it. Even if you save it, you can only use it one 1 mage, but the THREAT is still there. People won't mind losing a mage in a few turns time, but for some reason, they won't send in a mage as bait for the LW and then charge with other mages. So capitalise on this, and keep your LW ready to fire.
In an opposite side turtle match, the LW often does absolutely nothing. But it still makes people go around it. It's a psychological weapon, and often nothing more. But even psychological weapons can be useful. If it makes your opponent waste a turn going around it, use that extra turn to full advantage.
Finally, don't move a mage into LW range immediately after the LW as attacked. While your mage will indeed recover first, it will only do so one turn before the LW does, so you have to move it out straight away or it'll get zapped. If your opponent has moved a knight up next to your cleric in the meantime, you often have to choose between saving your cleric and saving your mage.
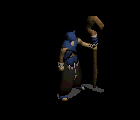
The Dark Magic Witch
- The Dark Magic Witch
Dark Magic Witch (DMW or witch for short).
This is a difficult unit to use well. It has so little blocking and HP that 2 hits from virtually anything will kill it even with healing, and 3 most certainly will. So you need to protect it.
This is best achieved with a BW, using the technique described above. If you take a hit but aren't threatened by anything immediately after attacking, heal and THEN barrier. This will give you more HP to play with after you de-barrier and retreat.
The witch, in the opposite corner turtle game, is either a flanking unit (if your opponent is defending) or as a unit for dealing with anything that gets through your defenses (if your opponent attacks). It's very, very useful for taking on attacking, unsupported scouts; take a hit, attack back, heal and barrier, and the enemy scout is on 18 (or 30 if they heal), your witch is on 22 and safe, and the enemy scout then has to retreat. It's also good for finishing off any knights that have got through your defensive wall, and preventing that cleric kill. And if you can do it, your opponent will too, so when you're attacking a defensive form, try and take out the witches if you can. This will stop your knights from being killed before they can get the cleric/chanty.
In a same side turtle game, the witch is far more useful. A LW/witch combo kills anything grey and mobile in the game except for the knight (which is left on 9). It also virtually kills a scout, even if the scout is healed. A common tactic is to barrier your injured knights, and use you witch to attack through the barriered knight to get to the enemy knights, without exposing your witch. You can also attack through your own full health knights (so long as there's nothing else threatening them) to kill any weakened units, and then heal later. And of course, if your opponent uses his LW, you can move up, do the BW trick, and just leave the witch there. It's a constant threat that way. Threats are everything in this game; they stop your opponent doing what he wants, and that gives you a chance to do what you want instead.
Witches are also good in rushes. The goal is simply, move in with knights, and attack whatever you can, then use the witch to clean up the damage and hurt some very important vital units like the scout, enchantress, or even cleric if you can. Often they'll end up having to sacrafice a unit just to stop the witch, and then you get a sacrafice unit anyways. If you have multiple witches from winning witch drops, then in the rush, it's simply put them all in the front row and attack whatever you can. Have 3 knights, a scout, and a cleric backing them up and in the end you might just come out on top.
The Pyromancer
- The Pyromancer
Pyromancers (pyro for short)
Firstly, don't stray too close to knights with them. Two knights hits kills a pyro even if healed once. A common mistake for newbs is to burn a knight first turn. I simply move up my knight and attack, he heals, I heal (negating the damage I took), he maybe takes a swing at my knight, I attack his pyro again and retreat back into my knight wall. Result: 17 damage (maybe) on my knight, 2 turn recovery on my cleric (both of which are irrelevant unless there are more pyros and witches around, because my knight wall is pretty solid), and I'm only facing 9 units.
Secondly, you can't put them near the front line and not expect them to come under heavy scout fire. Anyone who knows scout line of sight will just shoot straight through your knight wall and hit the pyro, and again, 3 hits kills a pyro even with one heal.
Thirdly, many people think "Oh, that LW is in recovery, I can move my pyros past it." You can't. Pyros have 3 recovery, LWs have 4, so ONLY if the LW has ONLY JUST acted can you move past it and attack. Otherwise, your pyro will still have recovery when the LW is ready for another shot. And even if you do move the pyro past it straight after the LW blast, there's always the chance that a good player will then move up a knight or scout to attack an undefended piece like the cleric, so you have to spend time protecting it... and if you don't move the pyro as soon as it has recovered, it will die from the LW shot... so you may end up having to choose to lose your cleric or pyro.
The main strengths of the pyro are that they can finish off very weak units without fear of blocking, and their long attack range (7 spaces). This makes them the only focus breakers you have, other than your scout. If the enemy is using a chanty, they will be useful if kept back and saved for the endgame, especially if your scout has been killed. As abyaly said, you can use them to force an opponent to heal and waste his cleric, but always consider the fact that a good player may well think that a knight on 39 health will still be able to take several hits before dying, and choose to go for the pyro instead of healing. The best way to force the opponent to heal is to do damage to weaker units like the scout, assassin, mages and enchantress, because they will die in 1 or 2 more hits unless healed immediately.
